Foundation Strengthening, specifically focusing on the two techniques you mentioned: Micro Piling and Soil Stabilization.
These methods are typically used when a building is settling (sinking), showing cracks, or when you need to add more floors to an existing structure.
Technique 1: Micro Piling
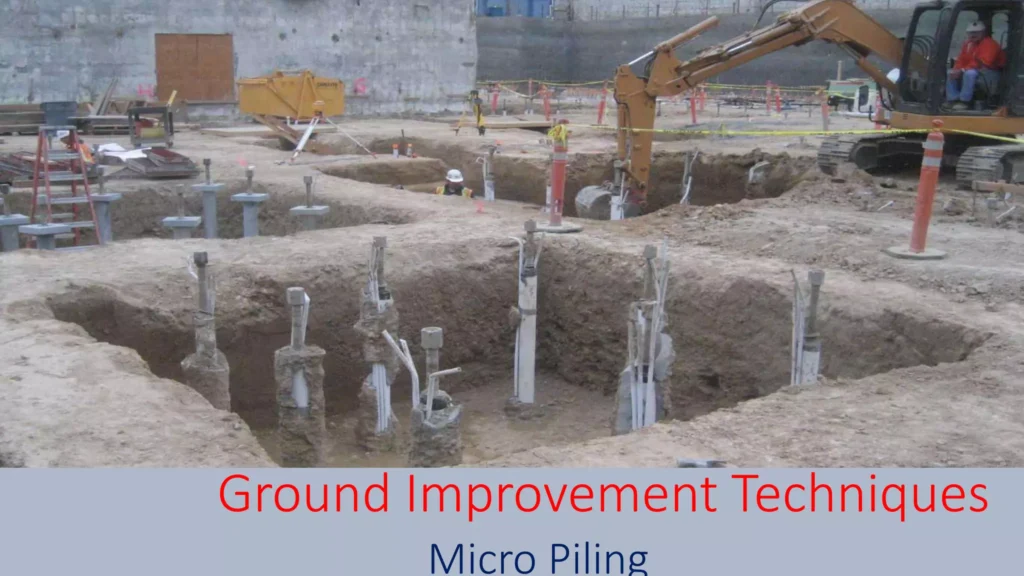
Best for: Transferring the building’s weight past weak soil to a deeper, stronger layer of rock or hard soil. This is effectively “bypassing” the weak foundation.
Phase 1: Drilling & Access
Site Access: Small, specialized drill rigs are brought in. Unlike massive piling rigs, these can fit inside basements or tight alleyways (low headroom).
Boring the Hole: The rig drills a small-diameter hole (usually 100mm to 300mm wide) through the existing foundation and down into the soil.
Casing Installation (Optional): If the soil is very loose and keeps collapsing, a steel casing (pipe) is drilled down simultaneously to keep the hole open.
Phase 2: Reinforcement & Grouting
Insert Steel Core: A high-strength steel bar (often threaded) is lowered into the drilled hole. This acts as the “spine” of the new pile.
Grout Injection: Cement grout is pumped into the hole from the bottom up.
Pressurized Grouting: The grout is often injected under high pressure. This forces the cement into the surrounding soil, bonding the pile tightly to the ground (friction).
Top Up: As the grout settles, more is added to ensure the hole is filled completely to the top.
Phase 3: Connection (The “Bracket”)
Capping: Once the grout cures (hardens), a steel plate or concrete cap is installed on top of the pile.
Bonding to Building: This cap is chemically bolted or concreted into the existing building foundation. The weight of the building is now effectively resting on these new steel-and-cement needles.
Technique 2: Soil Stabilization (Injection Grouting)
Best for: “Densifying” or solidifying loose soil directly beneath the house without installing deep steel piles. This alters the soil properties as you requested.
Phase 1: Survey & Detection
Drill Test Holes: Small holes (penny-sized) are drilled through the floor slab or around the perimeter.
Soil Testing: A penetrometer is often used to find exactly where the soil is weak (e.g., is the void at 3 feet deep or 10 feet deep?).
Phase 2: Injection Process
Insert Injection Ports: Metal tubes are inserted into the drilled holes to the depth of the weak soil.
Inject Material: Two common materials are used:
Cementitious Grout (Compaction Grouting): A thick, low-slump cement mix is pumped in under pressure. It forms a “bulb” that pushes the soil outward, compacting it and making it dense.
Polyurethane Resin (Chemical Grouting): A liquid resin is injected. It reacts with the soil and expands (foams) rapidly, filling voids and hardening immediately.
Monitor Lift: Laser levels are placed inside the house. As the injected material expands and strengthens the soil, it can actually lift the sunken floor back to its original level.
Phase 3: Cleanup
Seal Holes: The injection ports are removed, and the small drill holes are patched with concrete.
Curing: Unlike concrete, chemical resins cure in minutes; cement grouts may take a day or two.
Summary Difference:
Micro Piles are like putting your house on stilts that reach deep underground.
Soil Stabilization is like injecting filler into the ground to make the sponge-like soil hard as a rock.