FRP (Fiber Reinforced Polymer) Wrapping—commonly used in structural retrofitting and heritage conservation to strengthen columns and beams—here is the procedure formatted similarly to the previous response.
This process requires precision to ensure the carbon fiber bonds correctly to the concrete or masonry structure.
Phase 1: Surface Preparation (Critical Step)
The surface must be perfectly clean and sound for the carbon fiber to work.
Grind the Surface: Remove any paint, plaster, or loose concrete using a diamond grinder until you expose the aggregate.
Round the Corners: If wrapping a square or rectangular column, you must round off the sharp edges (chamfer) to a radius of at least 20–25mm. Carbon fiber can snap or fail if wrapped around a sharp 90-degree corner.
Clean: Use compressed air or an industrial vacuum to remove all dust. The surface must be dry and free of oil or grease.
Phase 2: Application of Base Layers
Apply Primer: Mix the epoxy primer and apply a thin coat to the concrete surface using a roller. This penetrates the substrate and ensures a good bond.
Wait time: Allow it to become “tacky” (sticky but not wet).
Apply Putty (Epoxy Paste): Use a trowel to apply epoxy putty over the primer.
Goal: Fill in any bug holes, cracks, or uneven areas. The surface must be perfectly smooth before the fabric goes on.
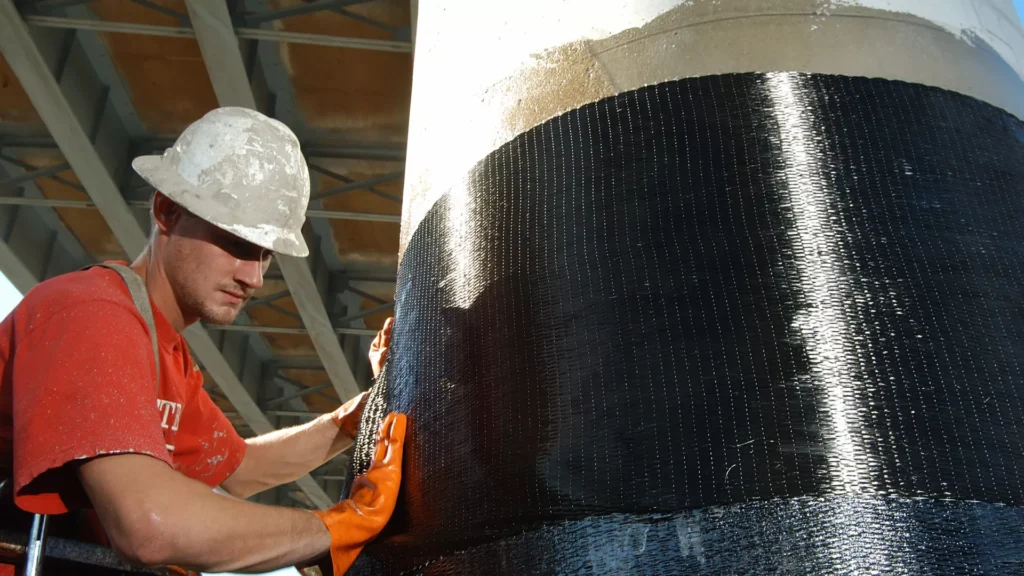
Phase 3: Wrapping the Carbon Fiber
Cut the Fabric: Pre-cut your Carbon Fiber sheets to the required length (accounting for overlap).
First Coat of Saturant (Resin): Apply a layer of saturant resin over the smoothed putty.
Apply the Sheet: Press the dry carbon fiber fabric onto the wet resin.
Technique: Wrap it tight. Ensure the fiber direction is correct (usually hoop direction for confinement/strengthening).
Remove Air Pockets: Using a specialized ribbed roller (aluminum or plastic), roll over the fabric firmly in the direction of the fibers.
Why: This pushes the resin through the fabric and squeezes out trapped air bubbles.
Second Coat of Saturant: Apply a final layer of resin over the top of the fabric to fully encapsulate it.
Phase 4: Finishing
Sand Broadcast (Optional but Recommended): While the final resin coat is still wet, throw dry silica sand onto it. This creates a rough texture so that plaster or paint can stick to it later.
Curing: Allow the system to cure for 24–72 hours (depending on product specifications) before applying any aesthetic topcoat or plaster.
Safety Note: Always wear a respirator, gloves, and eye protection when grinding concrete or handling epoxy resins and carbon fibers. Carbon dust is conductive and can irritate the skin/lungs.